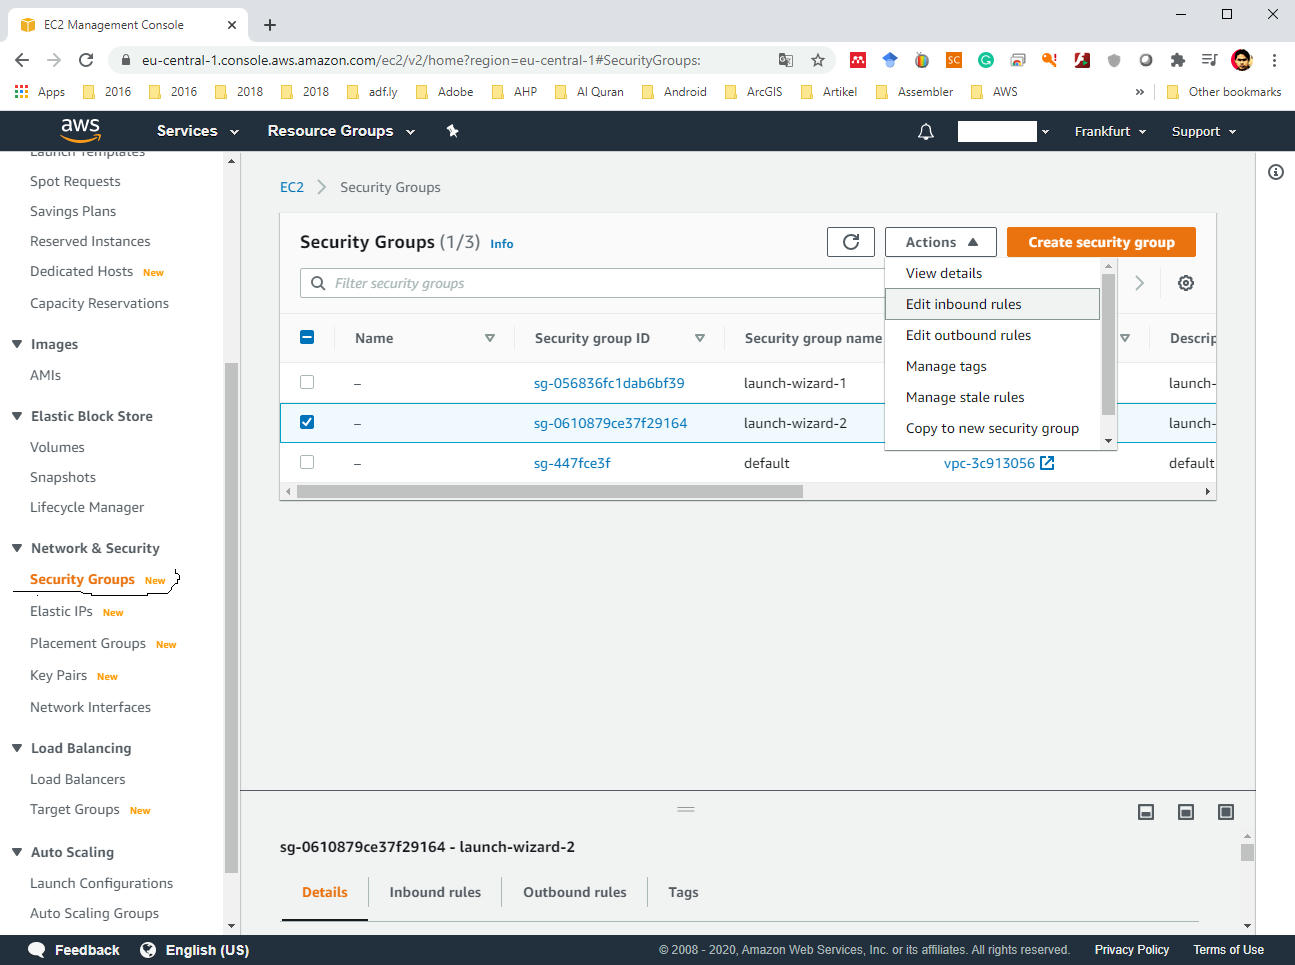
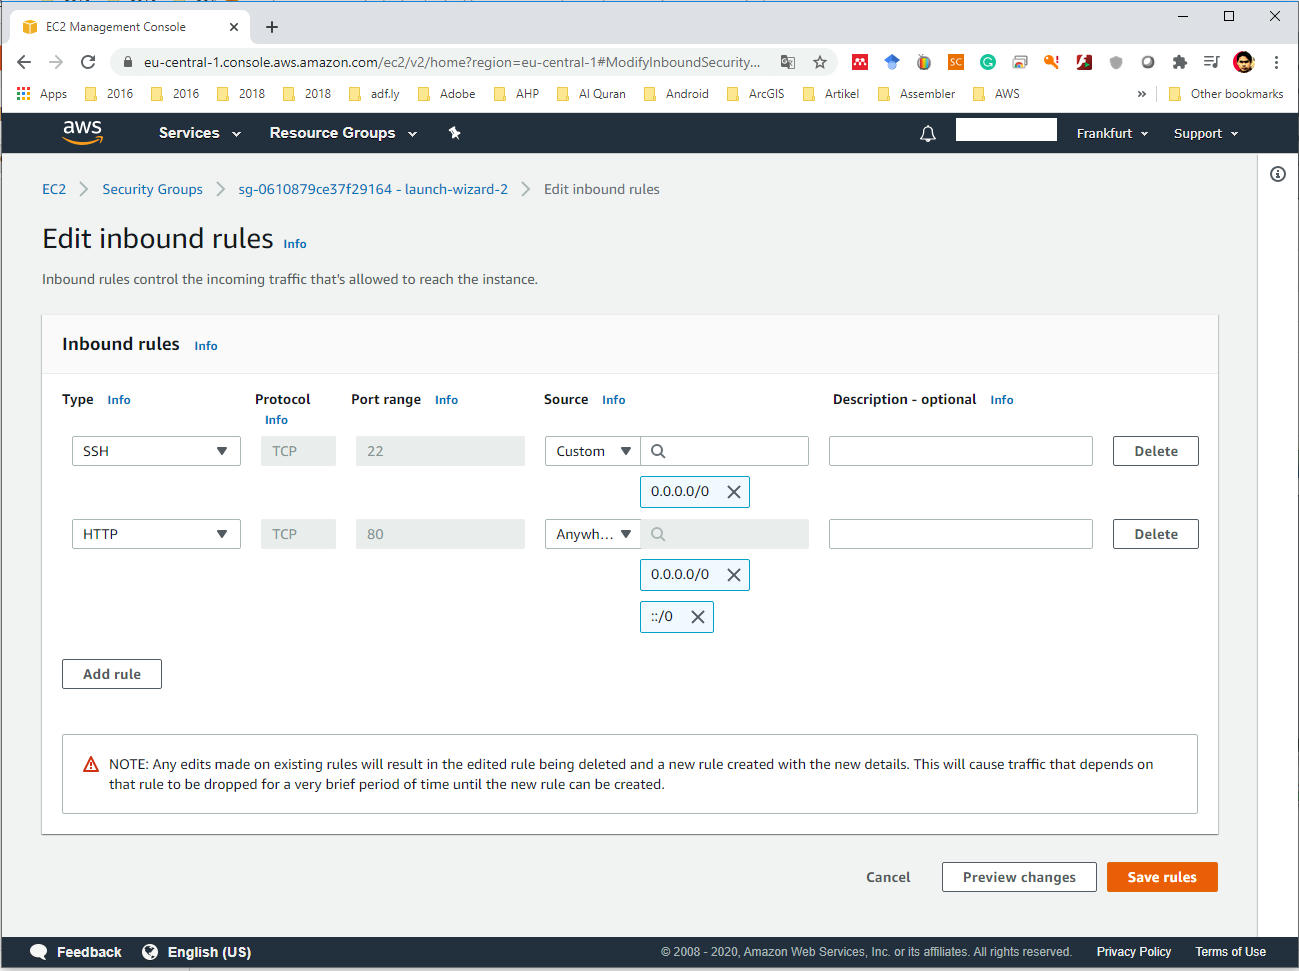
(venv) ubuntu@ip-172-31-5-17:~/django1/geodjango1-okus$ gunicorn --bind 0.0.0.0:8000 django1.wsgi:application
[2020-07-22 18:22:30 +0000] [27551] [INFO] Starting gunicorn 20.0.4
[2020-07-22 18:22:30 +0000] [27551] [INFO] Listening at: http://0.0.0.0:8000 (27551)
[2020-07-22 18:22:30 +0000] [27551] [INFO] Using worker: sync
[2020-07-22 18:22:30 +0000] [27554] [INFO] Booting worker with pid: 27554
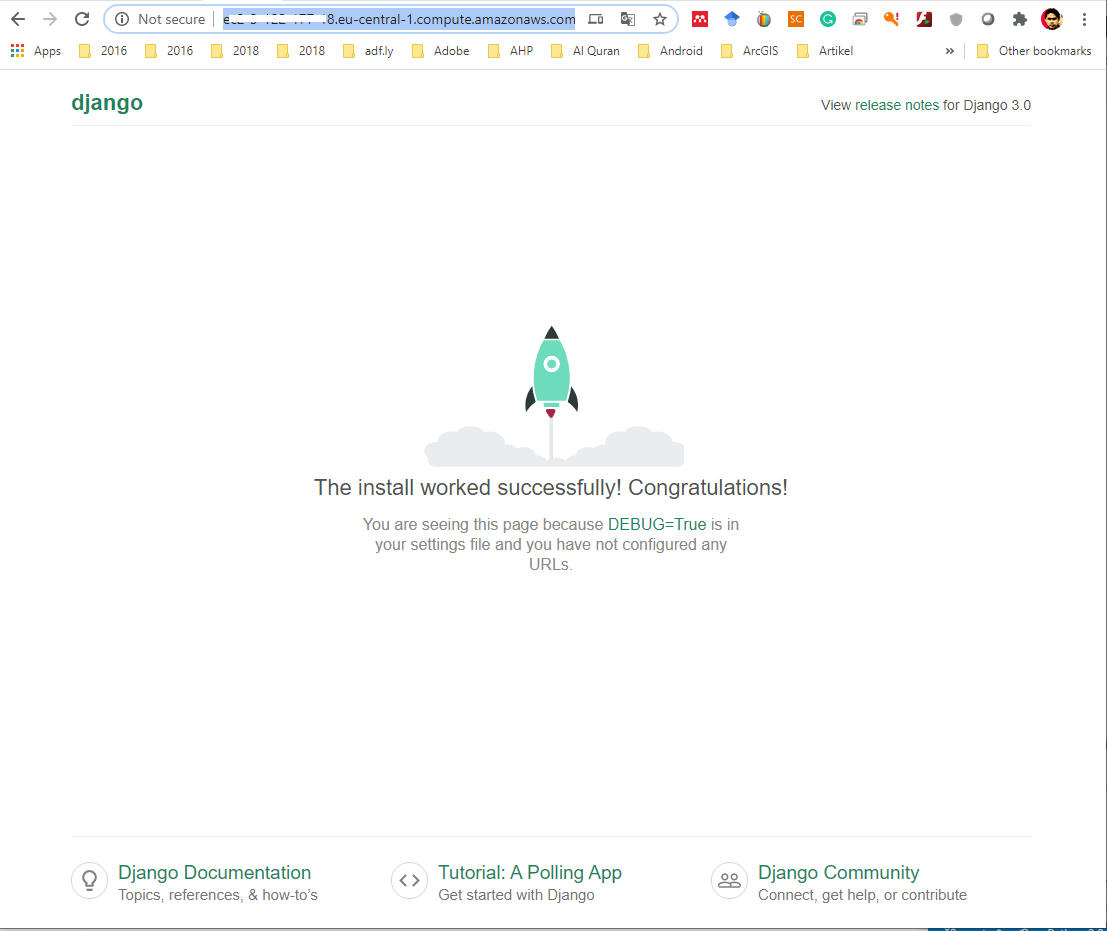
- Silahkan cek ke alamat PUBLIC DNS kita dan lihat hasilnya, dan jika berhasil maka akan menampilkan halaman django seperti di bawah ini
Selamat kita telah bisa menjalankan django dengan menggunakan AWS ec2. Kalau masih belum tampil seperti di atas coba cek mungkin ada langkah atau konfigurasi yang keliru.
Install supervisor
(venv) ubuntu@ip-172-31-5-17:~/django1/geodjango1-okus$ sudo apt-get install -y supervisor
(venv) ubuntu@ip-172-31-5-17:~/django1/geodjango1-okus$ cd /etc/supervisor/conf.d/
(venv) ubuntu@ip-172-31-5-17:/etc/supervisor/conf.d$ ls
(venv) ubuntu@ip-172-31-5-17:/etc/supervisor/conf.d$ sudo touch gunicorn.conf
(venv) ubuntu@ip-172-31-5-17:/etc/supervisor/conf.d$ ls
gunicorn.conf
(venv) ubuntu@ip-172-31-5-17:/etc/supervisor/conf.d$ mkdir /var/log/gunicorn
(venv) ubuntu@ip-172-31-5-17:/etc/supervisor/conf.d$ sudo nano gunicorn.conf
- Cek lokasi gunicorn, untuk menentukan lokasi command pada file gunicorn.conf
(venv) ubuntu@ip-172-31-5-17:/etc/supervisor/conf.d$ whereis gunicorn
gunicorn: /home/ubuntu/django1/venv/bin/gunicorn
- Masukan kedalam file gunicorn.conf
[program:gunicorn]
directory=/home/ubuntu/django1/geodjango1-okus
command=/home/ubuntu/django1/venv/bin/gunicorn --workers 3 --bind unix:/home/ubuntu/django1/geodjango1-okus/app.sock django1.wsgi:application
autostart=true
autorestart=true
stderr_logfile=/var/log/gunicorn/gunicorn.err.log
stdout_logfile=/var/log/gunicorn/gunicorn.out.log
[group:guni]
programs:gunicorn
(venv) ubuntu@ip-172-31-5-17:/etc/supervisor/conf.d$ sudo supervisorctl reread
guni: available
(venv) ubuntu@ip-172-31-5-17:/etc/supervisor/conf.d$ sudo supervisorctl update
guni: added process group
(venv) ubuntu@ip-172-31-5-17:/etc/supervisor/conf.d$ sudo supervisorctl status
guni:gunicorn RUNNING pid 29381, uptime 0:00:29
(venv) ubuntu@ip-172-31-5-17:/etc/supervisor/conf.d$ cd
(venv) ubuntu@ip-172-31-5-17:~$ cd /etc/nginx/sites-available/
((venv) ubuntu@ip-172-31-5-17:/etc/nginx/sites-available$ ls
default
((venv) ubuntu@ip-172-31-5-17:/etc/nginx/sites-available$ cat default
(venv) ubuntu@ip-172-31-5-17:/etc/nginx/sites-available$ sudo touch django.conf
(venv) ubuntu@ip-172-31-5-17:/etc/nginx/sites-available$ sudo nano django.conf
- Masukan kode program ke file django.conf
server {
listen 80;
server_name <ALAMAT PUBLIC DNS/IP>;
location / {
include proxy_params;
proxy_pass http://unix:/home/ubuntu/django1/geodjango1-okus/app.sock;
}
}
- Test nginx, setelah dilakukan konfigurasi tadi
(venv) ubuntu@ip-172-31-5-17:/etc/nginx/sites-available$ sudo nginx -t
nginx: the configuration file /etc/nginx/nginx.conf syntax is ok
nginx: configuration file /etc/nginx/nginx.conf test is successful
(venv) ubuntu@ip-172-31-5-17:/etc/nginx/sites-available$ sudo ln django.conf /etc/nginx/sites-enabled/
(venv) ubuntu@ip-172-31-5-17:/etc/nginx/sites-available$ sudo nginx -t
nginx: [emerg] could not build server_names_hash, you should increase server_names_hash_bucket_size: 64
- Pada saat saya coba sudo nginx -t, terdapat error nginx: [emerg] could not build server_names_hash, you should increase server_names_hash_bucket_size: 64, hal ini karena nama dns public kita terlalu panjang mak harus dirubah menjadi server_names_hash_bucket_size: 64.Makan perbaikan yang saya lakukan adalah rubah file nginx.conf. langkahnya adalah
(venv) ubuntu@ip-172-31-5-17:/etc/nginx/sites-available$ cd ..
(venv) ubuntu@ip-172-31-5-17:/etc/nginx$ ls
conf.d fastcgi_params koi-win modules-available nginx.conf scgi_params sites-enabled uwsgi_params
fastcgi.conf koi-utf mime.types modules-enabled proxy_params sites-available snippets win-utf
(venv) ubuntu@ip-172-31-5-17:/etc/nginx$ sudo nano nginx.conf
- Kemudian pada bahian http, hapus komentar untuk perintah server_names_hash_bucket_size 64 menjadi 128;
http {
##
# Basic Settings
##
sendfile on;
tcp_nopush on;
tcp_nodelay on;
keepalive_timeout 65;
types_hash_max_size 2048;
# server_tokens off;
server_names_hash_bucket_size 128;
# server_name_in_redirect off;
include /etc/nginx/mime.types;
default_type application/octet-stream;
##
# SSL Settings
##
ssl_protocols TLSv1 TLSv1.1 TLSv1.2; # Dropping SSLv3, ref: POODLE
ssl_prefer_server_ciphers on;
##
# Logging Settings
##
access_log /var/log/nginx/access.log;
error_log /var/log/nginx/error.log;
##
(venv) ubuntu@ip-172-31-5-17:/etc/nginx$ cd sites-available/
(venv) ubuntu@ip-172-31-5-17:/etc/nginx/sites-available$ sudo nginx -t
nginx: the configuration file /etc/nginx/nginx.conf syntax is ok
nginx: configuration file /etc/nginx/nginx.conf test is successful
- Restart service nginx, samapi tidak ada error
(venv) ubuntu@ip-172-31-5-17:/etc/nginx/sites-available$ sudo service nginx restart
- Terakhir cek halam web kita dengan alamat PUBLLIC DNS tanpa nomor Port, jika berhasil maka tampil halaman web django kita
Selamat kita sudah setting django dan server nginx dan gunicorn, sehingga aplikasi web django kita sudah erbhasil di deploy di server AWS ec2. Jika saat mencoba masih ada yang error silahkan di perhatikan lebih detail langkah-langkah diatas.
Jika ingin mendownload tulisan ini silahkan download disini.
Sekian dulu nanti dilanjut untuk tulisan Deploy Aplikasi Django di AWS EC2 Bagian 2. Terimakasih sudah menyimak semoga bermanfaat. @wawanhn


